
The Best Fluffy Pancakes recipe you will fall in love with. Full of tips and tricks to help you make the best pancakes.
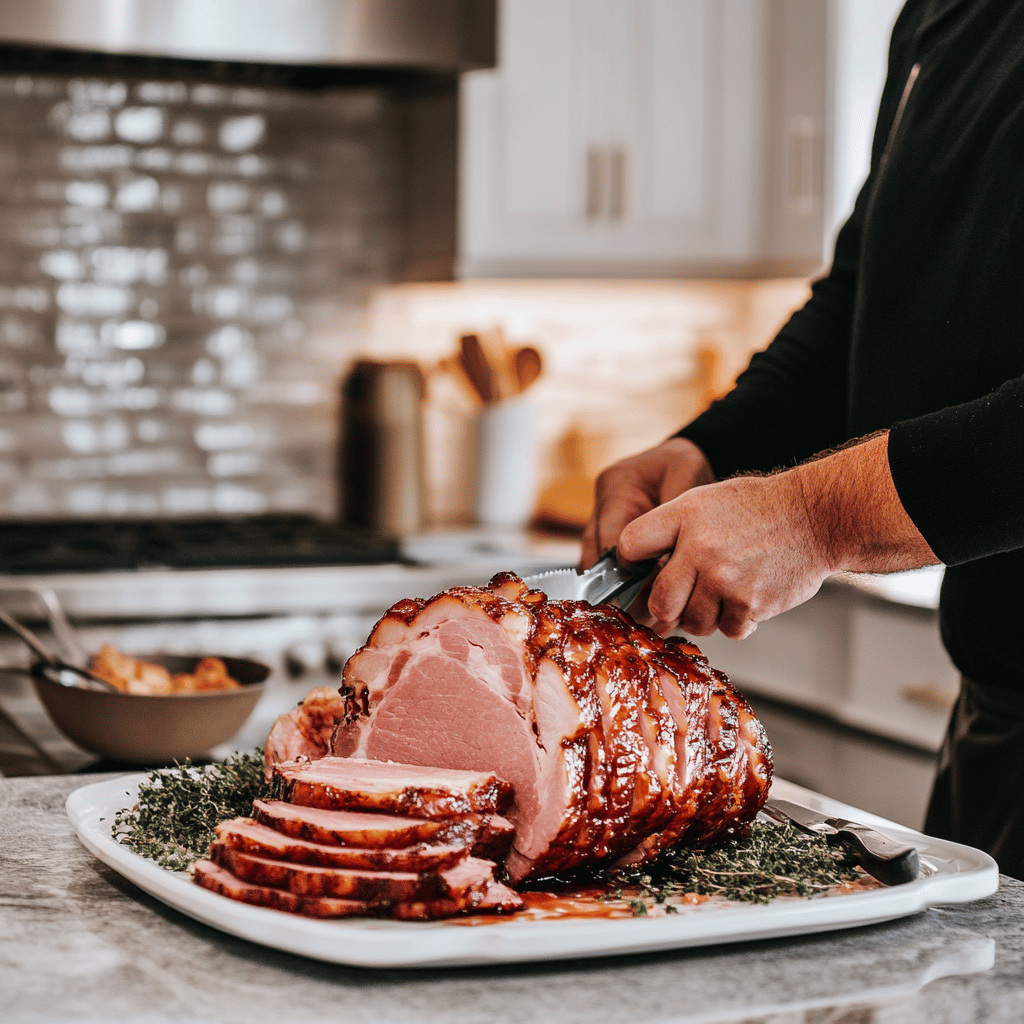
The Absolute Best Way to Slice a Whole Ham, According to Honey Baked
When it comes to holiday feasts, special occasions, or simply enjoying a delicious meal, few things can compete with the taste and appeal of a perfectly sliced whole ham. In this comprehensive guide, we’ll explore the absolute best way to slice a whole ham, drawing on expert insights from Honey Baked. Get ready to impress your guests and ensure every slice is just as delectable as it is beautiful!
Understanding the Types of Ham
Before diving into the slicing process, it’s essential to understand what type of ham you are working with. There are several varieties, each with distinct characteristics. Knowing the type of ham will guide how you slice it.
Types of Ham
- Bone-In Ham: This type retains its bone and often offers the best flavor. Slicing around the bone can be tricky, but it’s well worth it for the taste.
- Boneless Ham: Much easier to slice, boneless ham provides a uniform texture and is ideal for those unfamiliar with ham cutting.
- Glazed Ham: Typically sweetened with ingredients like honey or maple, glazed ham makes for a flavorful centerpiece but can be sticky, so sharp knives are a must.
- Spiral-Cut Ham: This style is pre-sliced, making it incredibly easy to serve. The spiral cuts are convenient but can be less visually striking than freshly cut slices.
Essential Tools for Slicing Ham
To achieve the perfect slices, you will need the right tools. Here’s what you should gather before getting started:
Knife Selection
- Carving Knife: A long, sharp carving knife is essential to create clean, even slices. Look for one with a tapered blade for better precision.
- Utility Knife: A smaller knife can help with any detailed work, like trimming, and navigating around the bone if you’re working with a bone-in ham.
- Cutting Board: Opt for a sturdy, large cutting board that can handle the size and weight of your ham.
- Ham Holder (Optional): A designated ham holder can stabilize the meat while you slice, making the job easier and safer.
Preparing the Ham for Slicing
Once you have gathered your tools, it’s time to prepare the ham. Here’s how to get started:
Step 1: Let It Rest
After cooking or heating a whole ham, let it rest for at least 20-30 minutes. This allows the juices to redistribute throughout the meat, ensuring it remains moist and flavorful.
Step 2: Positioning the Ham
Place the ham on your cutting board with the cut side facing down (if it’s a bone-in version). This helps stabilize the ham while you’re slicing, preventing it from rolling or slipping.
Step 3: Identify the Bone
For bone-in hams, locate the bone underneath the meat. Knowing its position is crucial for efficient slicing, allowing you to cut around it rather than through it.
The Best Slicing Technique
Now that you’re prepared, let’s get into the slicing technique that guarantees the best results.
Step 1: Start at the Shank End
The shank end is usually thinner and more challenging to slice neatly. Start here and make your initial cuts.
Step 2: Make Clean, Even Slices
Using your carving knife, slice parallel to the bone, making sure each cut is about 1/4 to 1/2 inch thick. Consistency is key!
Step 3: Rotate the Ham as You Slice
As you work your way around the ham, rotate it to maintain a comfortable cutting angle. This will help you make the best use of your knife’s length and ensure each slice looks polished.
Step 4: Cut Against the Grain
Pay attention to the grain of the meat. Cutting against the grain provides tender slices that are easier to chew and more enjoyable to eat. Take a moment to observe the direction of the muscle fibers before making your cuts.
Step 5: Use a Forward Motion
When slicing, use a gentle sawing motion rather than pushing down hard on the knife. This preserves the integrity of the meat and prevents tearing.
Clean Up and Presentation
After slicing your ham, you’ll want to think about serving it attractively. Here are some presentation tips:
Creating a Beautiful Platter
- Fan Out the Slices: Arrange the ham slices in a fanned out position on your serving platter, alternating directions for visual interest.
- Garnish: Consider using herbs, fruits, or edible flowers to enhance the visual appeal. Fresh rosemary or thyme pair beautifully with ham.
- Serve with Sides: Complement your ham with delicious side dishes. Consider serving it along with some savory stuffed shells or crispy potato dishes.
Storage Tips for Leftover Ham
If you happen to have any leftover ham (which may be unlikely!), storing it properly is vital to maintain freshness.
Refrigeration
- Only cut the portion you plan to serve, and cover the remaining ham tightly in plastic wrap or foil to prevent drying.
- Store the ham in the refrigerator, ideally in its original packaging, or in a sealed container, for up to 5-7 days.
Freezing
If you want to keep ham for a longer duration, consider freezing it:
- Slice the ham and place it in airtight freezer bags or containers, removing as much air as possible.
- Label the containers with the date and type of ham for easy identification later.
- Properly stored, frozen ham can last for up to six months.
Final Thoughts and Preparation for Serving
As you finalize your preparations, remember that the key to a great ham presentation lies in both the slicing technique and the plating. By following these expert tips and techniques from Honey Baked, you’ll not only serve an impressively sliced ham but also create a memorable experience for your guests.
Call to Action
Ready to wow your friends and family at your next gathering? Perfecting your ham slicing skills is just one part of mastering culinary delights. If you’re looking for a great dish to accompany your ham, check out this savory shrimp and sausage stew that will surely elevate your dining experience!