The Best Fluffy Pancakes recipe you will fall in love with. Full of tips and tricks to help you make the best pancakes.
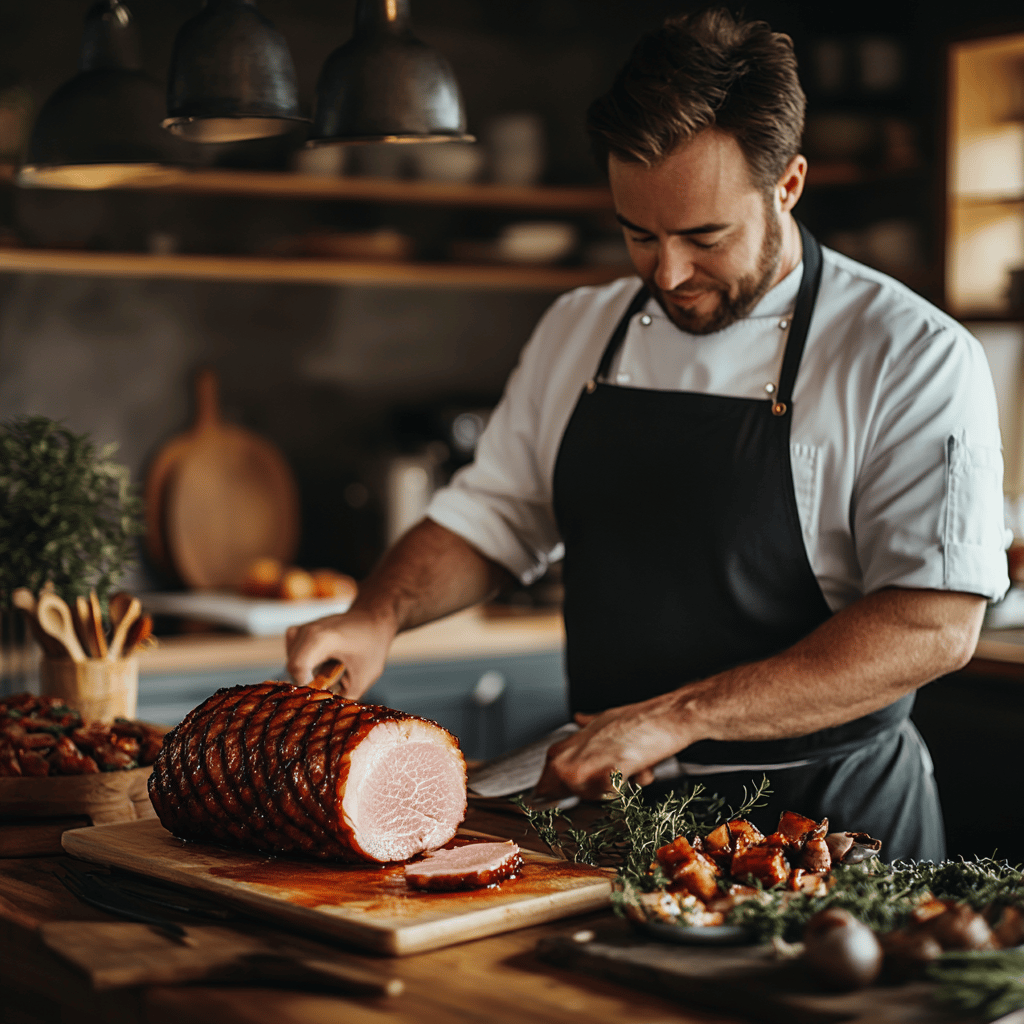
How to Keep Baked Ham From Drying Out, According to Professional Chefs
When it comes to holiday feasts and special occasions, a perfectly baked ham often steals the spotlight. However, achieving that succulent, juicy result can be tricky. Discover expert tips from professional chefs on how to prevent your baked ham from drying out, ensuring your dish is as delicious as it is memorable.
Introduction
There’s something undeniably festive about a baked ham gracing the table. Whether it’s for Thanksgiving, Christmas, or a family gathering, a beautifully glazed ham can elevate any meal. However, one of the most common pitfalls among home cooks is dryness. Dry ham can lead to disappointed diners and a less-than-stellar experience. Thankfully, professional chefs have shared their tried-and-true techniques for keeping that baked ham moist and flavorful. In this guide, we will explore various methods, tips, and secrets that will ensure your ham turns out perfect every time, along with recipes to help enhance your meal.
The Characteristics of a Perfect Baked Ham
Just before we dive into the techniques and tips, let’s clarify what we are aiming for in a perfect baked ham. The best hams are:
- Moist and juicy with a tender texture.
- Flavorful, with a balance of sweet, salty, and smoky notes.
- Visually appealing with an inviting glaze and a beautiful presentation.
Now, let’s explore how to maintain these characteristics and prevent your ham from drying out.
Choosing the Right Ham
The journey to a juicy baked ham begins long before it enters the oven. Selecting the right type of ham is crucial. Here’s what to consider:
Types of Ham
- Bone-In Ham: This type has great flavor and moisture because the bone contributes to the taste. It takes longer to heat but is worth the wait.
- Boneless Ham: Easier to slice and serve, but may dry out faster than bone-in options. It’s essential to monitor the internal temperature closely.
- Spiral-Sliced Ham: This ready-to-eat option offers convenience but can dry out because it’s pre-sliced. Making sure to cover it properly during cooking is vital.
Fresh vs. Pre-Cooked Ham
Fresh hams require more cooking time and attention but offer a unique flavor. In contrast, pre-cooked hams are convenient due to their shorter cooking time but can be prone to drying out quickly if not managed well.
Prepping Your Ham for Baking
The preparation of your ham can significantly impact its moisture content. Here are the essential steps to follow before baking:
Soaking Your Ham
Soaking your ham in water or a brine solution ahead of time can infuse moisture. Here’s how you can do it:
- Fill a large container with cold water or a brine solution made of water, salt, sugar, and spices.
- Allow your ham to soak for several hours, or preferably overnight.
- Rinse the ham with cold water and pat dry before baking.
Adding Moisture with Marinades or Brines
Besides just soaking, marinating the ham can also add more flavor and moisture. Try using simple mixtures that include:
- Apple cider or orange juice for a fruity undertone.
- Mustard or honey for a sweet and sour punch.
- Herbs and spices to infuse flavor directly into the meat.
Cooking Techniques to Keep Ham Moist
Cooking technique is where the magic happens. Here are some tried-and-true methods to keep your baked ham from drying out:
Covering Your Ham
When baking, covering your ham with foil helps retain moisture. Professional chefs often suggest the following:
- Wrap the ham in aluminum foil loosely to allow air to circulate.
- Remove the foil during the last 20-30 minutes of baking to caramelize the glaze.
Using a Water Bath
A water bath is a fantastic way to provide a moist cooking environment. Here’s how:
- Place the ham in a roasting pan filled with water or broth.
- The steam created will keep the ham moist throughout the cooking process.
Cooking at Low Temperatures
Cooking your ham at a lower temperature can lead to a juicier result. Aim for:
- A cooking temperature of no more than 325°F (165°C).
- Longer cooking times ensure the fat renders properly and keeps the meat juicy.
Understanding Internal Temperatures
Accurately measuring the internal temperature is crucial for a properly baked ham. Here’s what you need to know:
Using a Meat Thermometer
A good digital meat thermometer is a cook’s best friend. Here’s how to use it effectively:
- Insert the thermometer into the thickest part of the ham, avoiding the bone.
- Aim for an internal temperature of 140°F (60°C) for a fully cooked ham.
- For fresh cuts, ensure you reach at least 145°F (63°C).
Glazing Your Ham
A glaze not only adds flavor but also helps retain moisture. Here’s how to achieve that perfect glaze:
Choosing Your Glaze
There are countless glaze options, but here are some favorites that professional chefs recommend:
- Bourbon Brown Sugar Glaze: Combine brown sugar, bourbon, soy sauce, and mustard for a sweet and tangy flavor.
- Honey Mustard Glaze: Mix honey, Dijon mustard, and apple cider for a classic taste.
- Pineapple-Maple Glaze: A mix of pineapple juice, maple syrup, and cloves offers a tropical twist.
How to Apply the Glaze
For optimal flavor and moisture retention:
- Apply the glaze in the last 30 to 45 minutes of cooking.
- Brush it generously on, ensuring it seeps into any cuts made in the surface.
- Use it repeatedly for a thicker, caramelized layer.
Resting Your Ham
Patience is key! Allowing your ham to rest post-baking is crucial for moisture retention:
- Let the ham rest for at least 20-30 minutes before slicing.
- This allows the juices to redistribute, keeping the meat moist and flavorful.
Serving Suggestions
Once your ham is beautifully cooked and rested, it’s time to serve. Here are some ideas to accompany your dish:
Classic Side Dishes
- Scalloped potatoes or cheesy potato dishes.
- Roasted vegetables or a fresh side salad.
- Cranberry sauce for a touch of sweetness.
Creative Pairings
Take your ham to the next level with unique dishes:
- Incorporate it into a savory potato boat.
- Serve alongside stuffed peppers for a Mediterranean twist.
- Pair with a refreshing strawberry salad for a summer feel.
Conclusion
Cooking a baked ham doesn’t have to be a daunting task. By selecting the right type of ham, employing moisture-retaining techniques, and implementing expert tips for cooking and glazing, you can ensure your ham turns out juicy and delicious every time. Remember that patience pays off, especially during the resting period, when those flavors can meld beautifully.
If you liked this, check out our recipe for Savory 30-Minute Shrimp Fajita Bowl for some deliciously easy meal ideas to complement your ham feast!